
This means that Latch USB Monitor will ask Latch servers what to do when a certain PNP device is detected in a Windows machine. So the administrator has a tool to potentially react to plugged devices, and modify the behavior and scripts launched in any way, at any moment, just sliding a bar from his mobile device.
How it works
Latch USB Monitor works as a service and has a GUI to configure it. That means it still works and monitors incoming devices even when no user is logged in. The service is constantly monitoring any device with the characteristics given by the user. When it occurs, it asks Latch servers and reacts in the way that the user has configured it.
It may as well be used as an alerting system, with no action associated to an event. So if a device is plugged to the machine, a blocking message is sent by Latch to the mobile device, but no action is taken.
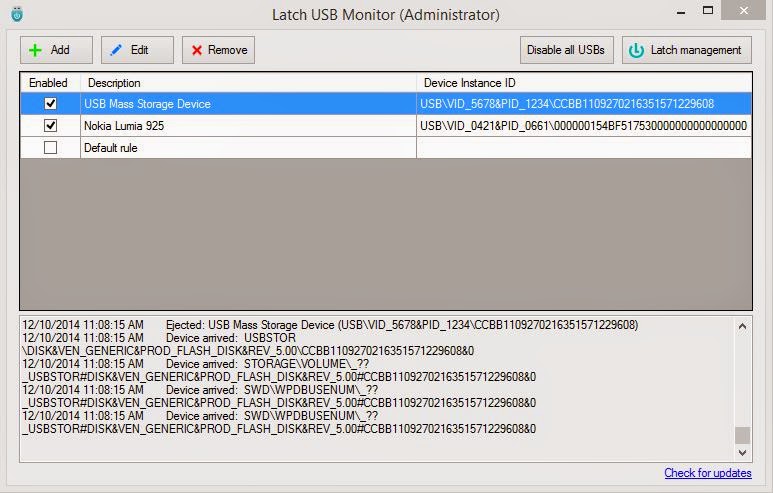 |
| Latch USB Monitor with some configured rules |
How to install it
No special instructions. Just accept the license and choose the path. If, for the sake of security, you do not want the service to run as SYSTEM, you may change it to whatever account you wish, as long as it has privileges to run as a service, and network access.
A config file is created in XML format. This file contains sensitive information. Take care with the permissions specially in shared computers.
Pairing with Latch
First of all, a Latch account has to be set with a pairing token. Go to Latch management and add the App ID and secret. A timeout is specified here. This means that if the computer is not connected to a network or, for any other reason it cannot get a response from Latch in the specified time limit (0 milliseconds by default which corresponds to no timeout) the “no response” action is applied.
How to add and configure a device
Each monitored device, may have these fields:
- Device (optional): If your device is currently plugged in, you can choose it from this dropdown menu where all attached devices are listed.
- Description (optional): Giving a meaningful description of the device helps you better identify it in the main list.
- Device Instance ID: The ID that uniquely identifies a device in a Windows machine. When an arriving Device Instance ID is detected it goes through a matching system that can be used to discard or allow the rule. If the string set matches, the Latch query will be launched. This is treated as a string, so “Starts with”, “Contains”… may be used to match.
- Operation ID: The operation ID used in Latch.
- Actions.Open (optional): If the Latch query responds with an “on”, the process specified here will be launched, with the specified argument set (optional).
- Actions.Closed (optional): If the Latch query responds with an “off”, the process specified here will be launched, with the specified argument set (optional).
- Actions.No response (optional): If the Latch query doesn’t respond (because there’s no connectivity, for instance, after the timeout declared in “Latch settings”), the process specified here will be launched, with the specified argument set (optional).
 |
| Device details with pendrive example |
The tool is written in C# and may be freely downloaded from: https://elevenpaths.com/downloads/LatchUSBMonitor.zip. You may want to check out Latch Event Monitor, too.
We encourage you to use it.