Admins have to follow the usual steps if they want to protect ownCloud with Latch:
- Create a developer account if they haven´t it.
- Create an application with the features they want.
- Download the plugin.
- Install and configure the plugin in their ownCloud environment.
Steps 1, 2 and 3 are documented on the website of Eleven Paths and step 4 is going to explained in this post.
ownCloud plugin is a zip file, copy its contents to the apps directory of ownCloud.
 |
| ownCloud apps directory |
After copying the plugin, ownCloud administrator has to access his own account and enabled. To do so, go to the “Apps” section, tap the “+ Apps” button and go to the Latch plugin referenced as “Latch Authentication Plugin”
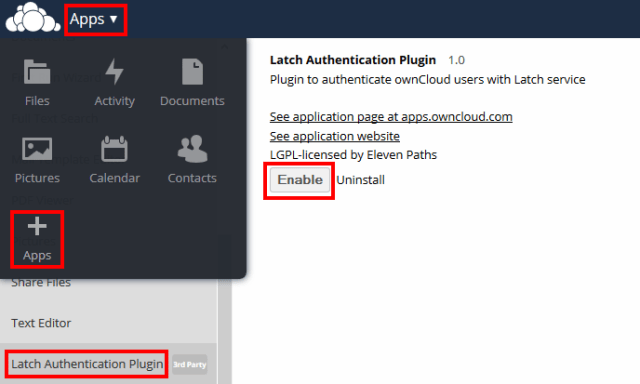 |
| Enabling Latch plugin |
After enabling the plugin, the administrator has to enter the “Application ID” and the “Secret” to the section corresponding to “Latch Configuration” under the “Admin” menu.
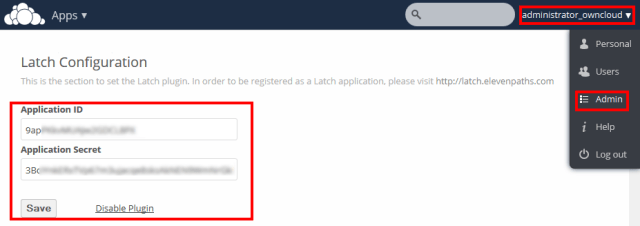 |
| Introduce the Application ID and Secret |
Latch is now ready to be used and users are ready to pair their accounts. Users with ownCloud accounts have to set their own accounts going to “Personal – Latch Account”. Type the token generated on the phone into the text box displayed on the web.
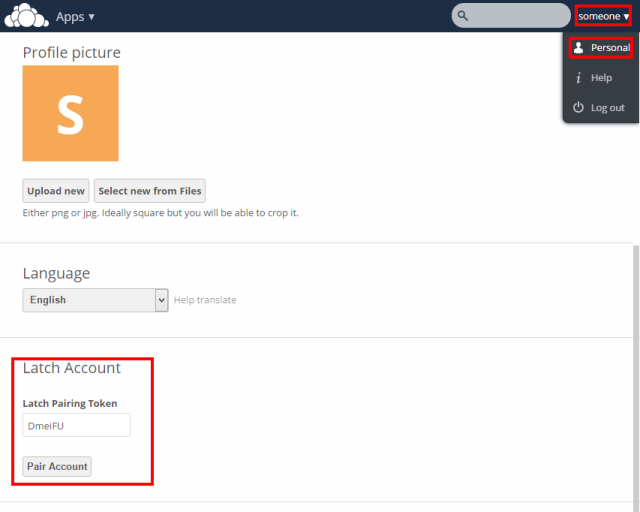 |
| Introduce the token generated by Latch |
A notification will be received on the phone, announcing that the account is already paired.
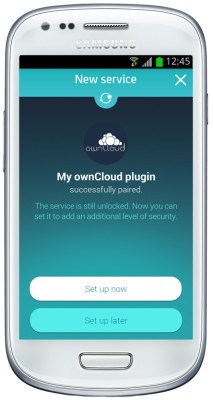 |
| Notification received after successful pairing |
Now the user may lock and unlock access to his ownCloud account and a notification on his phone will be received, warning about somebody trying to access the account
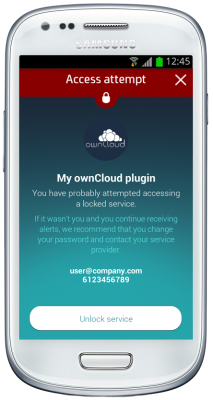 |
| Notification of an unauthorized access attemp |
The database
When Latch is installed in ownCloud, ownCloud database is set to store the values needed by Latch. Specifically the oc_appconfig table stores the “Application ID” and “Secret”.
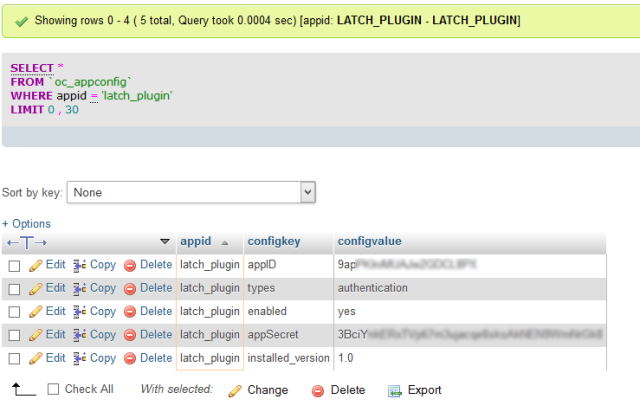 |
| oc_appconfig table with the Application ID and Secret |
The oc_ preferences table indicates which user account has been paired with Latch.
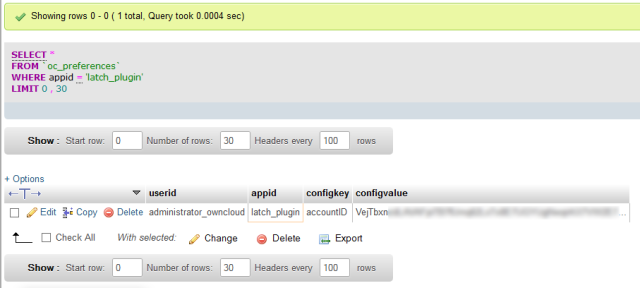 |
| oc_preferences table with the users that have already paired their accounts |

